installing Windows Operating System on
SATA for those owning older mainboards with SATA
support an extra step is required while attempting to install Windows
XP. Windows XP does not provide drivers for all the SATA controllers,
therefore, during the installation procedure, the user need to insert a
floppy with the drivers that came in the package along with the
motherboard.

The real problem comes with the Mechines like Notebook, Laptops and PC's that doesn't have a floppy disk drive connected. Actually i had that same problem and it makes me crazy for a while, im Expert installing Microsoft Windows on a PC in my life time i have installed O/S's more than 1000 times,but this thing makes really headache to me, Finally I found the answer and hear its for you.
Install Windows XP on SATA (Laptop) without a Floppy (F6 Option)
Very first before you begin the tutorial you need collect following tools(Software and CD's) and a good Computer that runs O/S Windows XP (Because in this Lesson i used Win XP SP2 ) and a CD Writer.
Load the Image File to Virtual PC and check whether Bootable image is working properly or not if its working properly you are redy to boot your PC without F6 option or Disk unrecognized problem.

The real problem comes with the Mechines like Notebook, Laptops and PC's that doesn't have a floppy disk drive connected. Actually i had that same problem and it makes me crazy for a while, im Expert installing Microsoft Windows on a PC in my life time i have installed O/S's more than 1000 times,but this thing makes really headache to me, Finally I found the answer and hear its for you.
Install Windows XP on SATA (Laptop) without a Floppy (F6 Option)
Very first before you begin the tutorial you need collect following tools(Software and CD's) and a good Computer that runs O/S Windows XP (Because in this Lesson i used Win XP SP2 ) and a CD Writer.
- Download Microsoft .NET Framework that suitable for your computer and Install it.
- Identify your processor architecture is it cud be 32bit (x86) or 64bit (x64).
- 32bit (x86) for Win XP SP 1 from http://www.microsoft.com
- 64bit (x64) for Win XP SP 1 from http://www.microsoft.com
- 32bit (x86) for Win XP SP 2 from http://www.microsoft.com
- 64bit (x64) for Win XP SP 2 from http://www.microsoft.com
- Identify your Windows Service Pack Version.
- search on internet for suitable .NET framework for your machine.
- Download N-Lite (He is the Goad ho doing Hole work) from http://www.nliteos.com and Install it. ( if you found a floppy image of drivers you need Total Commander to extract it )
- Download Total Commander from http://www.ghisler.com and Install it.
- Find on internet for suitable SATA Driver file for your computer,Download it and save it some wear safe.
- Get a working copy of Windows XP Bootable CD (it will be genuine or not it doesn't matter, only matter is the Bootable CD is working properly on other PC's)
- ( This Step is Optional and its just for Safety - for test the boot image)
- Download Virtual PC ( VPC 32bit , VPC 64bit ) From http://www.microsoft.com and Install it and Create a Virtual Machine on currant pc for test your Bootable CD
Okay, Lets begin the work
- Install Downloaded Software's on your machine
- Put Bootable CD to your CD rom
- Start N-Lite
- Select Botebale CD
- After Selecting CD Below Dialogue box Will appear and it ask the location to copy the files to Heard Disk
- Create Folder To Copy files to the Hard Disk
- N-Lite copying the files to the computer it will take a little time
- N-Lite has finished copying files to the computer you can see the details of your files, Click Next
- Click Next to skip this window and click next
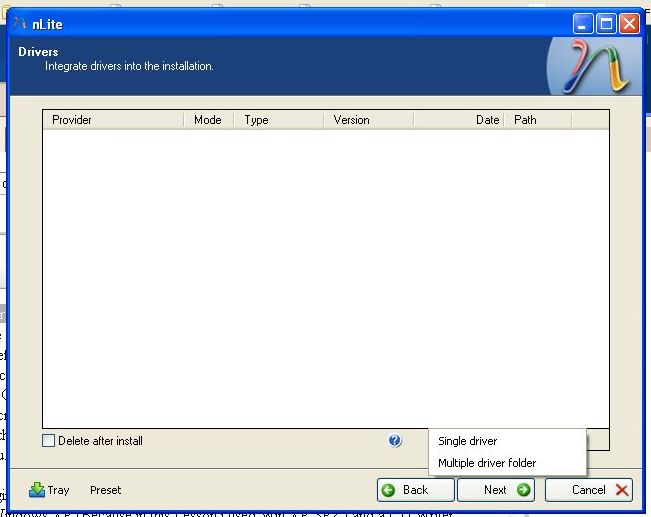
- Tear is a meny options on this window but in this case we only need to add the SATA drivers to the XP CD thats all so select Drivers in integrate category and we also need to create the image file that we can burn to the CD later.
- Click on insert button and select multiple driver folder
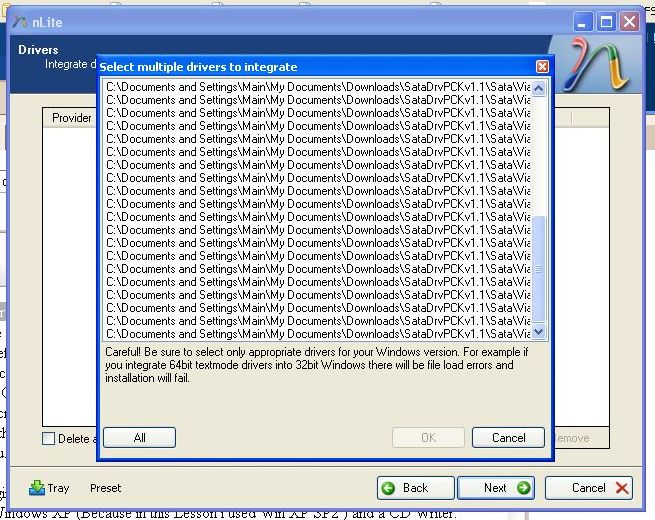
- Select the location of downloaded drivers
- Click All to Select all the drivers
- Use CTRL key to add multiple drivers, remember select only Win XP (32bit or x86) drivers for Win XP Bootable CD and also always select "text mode drivers" for Bootable CD.
- After that it will ask you to start processing press yes and N-lite will create Bootable disk
- Click on "make ISO" and select the path to save the image file

 |
| Staring N-Lite |
 |
| Select Windows Bootable CD |

 |
| Select Folder To Save Files on |


 |
| CTRL to add separate drivers |
 |
| After adding all the Drivers |


 |
| Select Location to Save the Bootable image file |
Thanks, this is generally helpful.
ReplyDeleteStill, I followed step-by-step your method in this
dot net training online india
.net online training